新增前端组件
当JitAi开发框架中现有的前端组件无法满足特定业务需求时,开发者可以在components.Meta下扩展新的组件,并在JitAi可视化开发工具中为页面添加这个新组件。
接下来我们以一个简单的计数器组件为例,演示如何新增前端组件。计数器组件具有显示数值、点击按钮增减数值等基础功能。
在前端领域,现有的门户、页面类型完全够用,其实并没有太多的扩展必要性,但组件却有极大的扩展空间,以应对各种个性化的展示需求。
效果预览
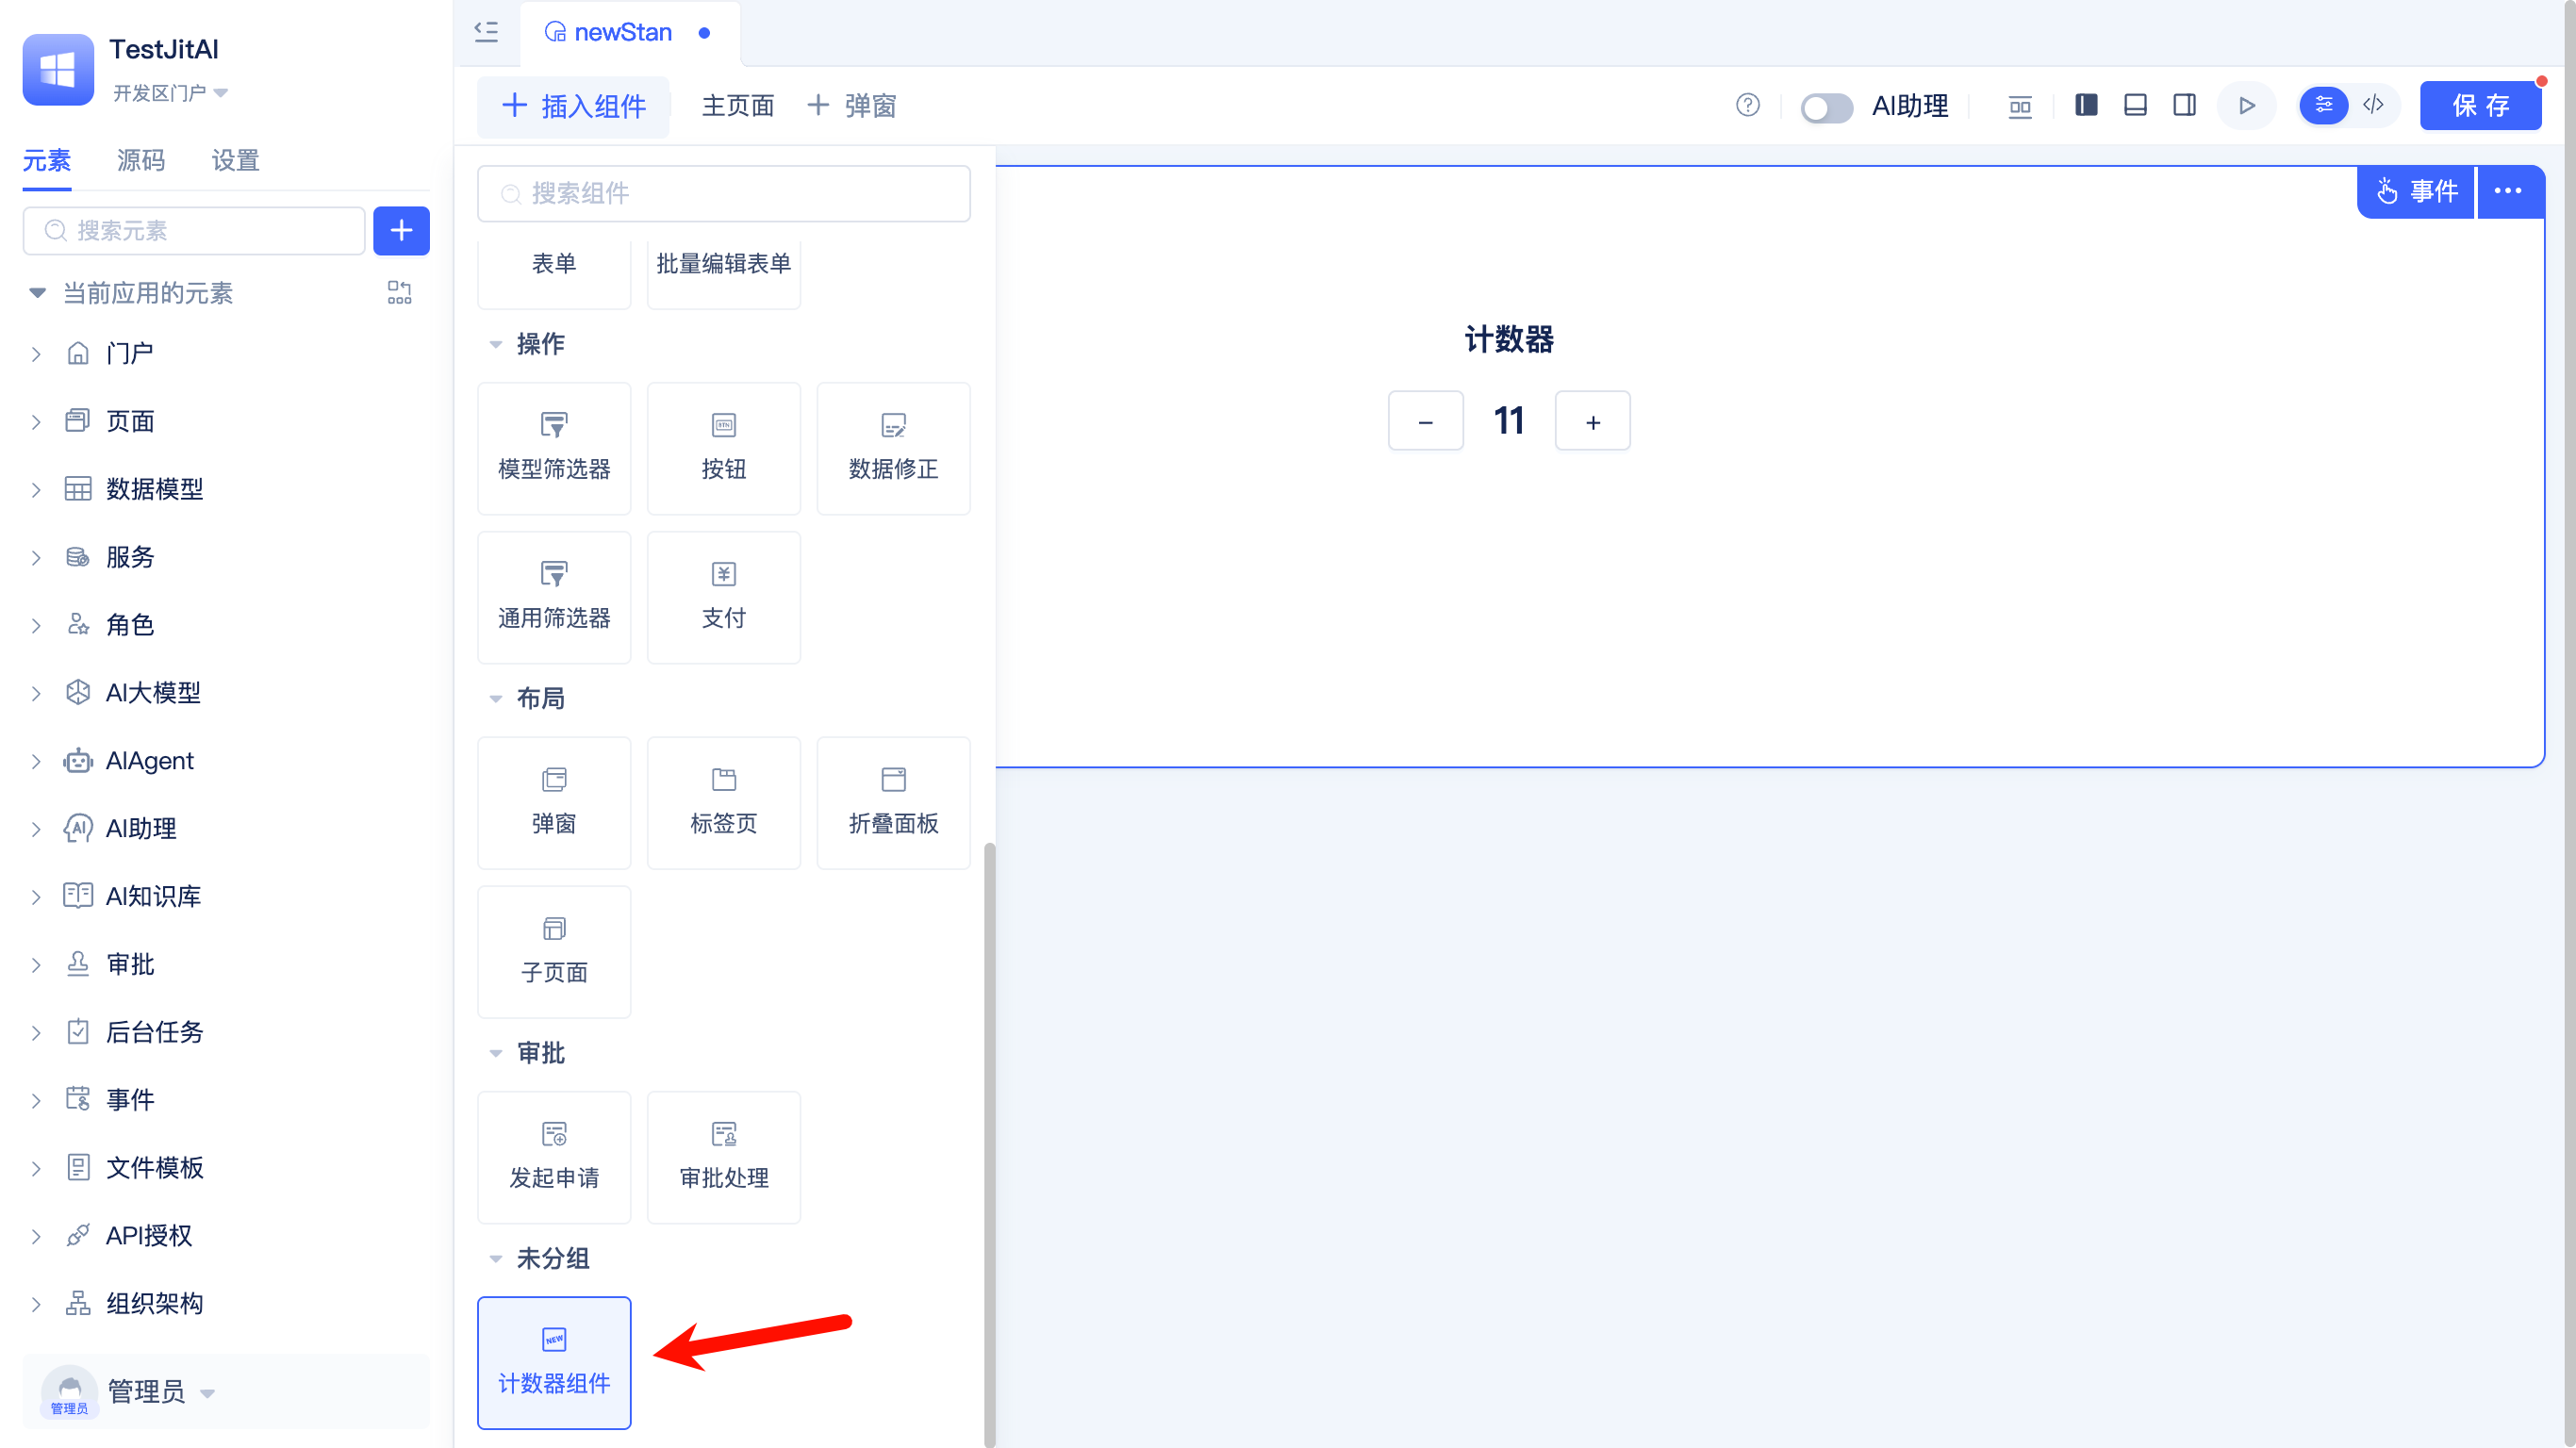
元素设计
| 元素层次 | fullName | 主要职责 |
|---|---|---|
| Meta元素 | components.Meta | JitAi开发框架中现有的Meta元素(无需创建) |
| Type元素 | components.CounterType | type指向components.Meta,封装基础计数器功能,处理数值增减、样式配置等 |
| 在页面中使用时的配置 | 页面scheme.json | 在页面中配置组件的具体运行时参数并声明事件、函数、变量 |
计数器组件的目录结构
├── components/
│   └── CounterType/
│       ├── e.json
│       ├── constants.ts          # 常量定义
│       ├── index.ts              # PC端入口文件
│       ├── index.mobile.ts       # 移动端入口文件
│       ├── CounterComponent.ts   # 业务逻辑层(PC和移动端共用)
│       └── render/
│           ├── pc/
│           │   └── CounterRender.tsx    # PC端渲染组件
│           └── mobile/
│               └── CounterRender.tsx    # 移动端渲染组件
操作指南
创建目录结构
在您的JitAi应用根目录中,按照以下结构创建目录:
# 在应用根目录执行
mkdir -p components/CounterType
mkdir -p components/CounterType/render/pc
mkdir -p components/CounterType/render/mobile
实现元素文件
- 元素定义文件
- 入口文件
- 渲染组件
- 业务逻辑
创建元素声明文件 components/CounterType/e.json:
{
  "frontBundleEntry": "./index.ts",
  "frontMobileBundleEntry": "./index.mobile.ts",
  "description": "计数器Type元素,封装计数器核心功能",
  "title": "计数器组件",
  "type": "components.Meta",
  "outputName": "index"
}
创建PC端入口文件 components/CounterType/index.ts:
import Render from './render/pc/CounterRender';
import { CounterComponent } from './CounterComponent';
export { COUNTER_EVENTS } from './constants';

// 重命名导出供JitAi工具识别
export { CounterComponent as ComponentCls, Render };
创建移动端入口文件 components/CounterType/index.mobile.ts:
import Render from './render/mobile/CounterRender';
import { CounterComponent } from './CounterComponent';
export { COUNTER_EVENTS } from './constants';

// 重命名导出供JitAi工具识别
export { CounterComponent as ComponentCls, Render };
创建PC端渲染组件 components/CounterType/render/pc/CounterRender.tsx:
import React, { useState } from 'react';
import { Button, Typography, Space } from 'antd';

const { Title, Text } = Typography;

interface CounterRenderProps {
  compIns: any; // 组件实例
}

const CounterRender: React.FC<CounterRenderProps> = ({ compIns }) => {
  const [count, setCount] = useState(compIns.config?.initialValue || 0);

  const handleIncrement = () => {
    const newValue = count + 1;
    setCount(newValue);
    compIns.value = newValue;
  };

  const handleDecrement = () => {
    const newValue = count - 1;
    setCount(newValue);
    compIns.value = newValue;
  };

  return (
    <div>
      <Title level={4}>计数器</Title>
      <Space>
        <Button onClick={handleDecrement}>-</Button>
        <Text>{count}</Text>
        <Button onClick={handleIncrement}>+</Button>
      </Space>
    </div>
  );
};

export default CounterRender;
创建移动端渲染组件 components/CounterType/render/mobile/CounterRender.tsx:
import React, { useState } from 'react';
import { Button, Typography, Space } from 'antd';

const { Title, Text } = Typography;

interface CounterRenderProps {
  compIns: any; // 组件实例
}

const CounterRender: React.FC<CounterRenderProps> = ({ compIns }) => {
  const [count, setCount] = useState(compIns.config?.initialValue || 0);

  const handleIncrement = () => {
    const newValue = count + 1;
    setCount(newValue);
    compIns.value = newValue;
  };

  const handleDecrement = () => {
    const newValue = count - 1;
    setCount(newValue);
    compIns.value = newValue;
  };

  return (
    <div>
      <Title level={5}>计数器</Title>
      <Space>
        <Button onClick={handleDecrement}>-</Button>
        <Text>{count}</Text>
        <Button onClick={handleIncrement}>+</Button>
      </Space>
    </div>
  );
};

export default CounterRender;
创建常量文件 components/CounterType/constants.ts:
// 计数器事件类型常量
export const COUNTER_EVENTS = {
  VALUE_CHANGE: 'valueChange'
} as const;
创建组件逻辑类 components/CounterType/CounterComponent.ts:
import type { ComponentConfig } from 'components/Meta/frontend/type';
import { Jit } from 'jit';

export class CounterComponent extends Jit.BaseComponent {
  public value: number;

  /**
   * 必须实现:获取组件变量列表
   * 用于可视化编辑器显示可用变量
   */
  static getVariableList(compConfig: Record<string, any>) {
    return [
      {
        name: 'value',
        title: '当前值',
        dataType: 'Numeric'
      }
    ];
  }

  /**
   * 必须实现:获取组件函数列表
   * 用于可视化编辑器显示可调用方法
   */
  static getFuncList(compConfig: Record<string, any>) {
    return [
      {
        title: '获取值',
        name: 'getValue',
        args: []
      }
    ];
  }

  /**
   * 必须实现:获取组件事件列表
   * 用于可视化编辑器显示可监听事件
   */
  static getEventList() {
    return [
      {
        name: 'valueChange',
        title: '值变化',
        data: 'eventData'
      }
    ];
  }

  constructor(componentInfo: ComponentConfig<any>) {
    super(componentInfo);
    this.value = this.config?.initialValue || 0;
  }

  getValue(): number {
    return this.value;
  }

  async init() {
    await super.init();
  }
}
1. 完全匹配以下导出名称
- 组件类export时必须使用
ComponentCls名称 - 渲染器类export时必须使用
Render名称 - 实际的class名称可以自定义(如CounterComponent、CounterRender等) 2. 实现三个静态方法
// 获取组件变量列表(用于编辑器显示可用变量)
static getVariableList(compConfig: Record<string, any>): Array<{
  name: string;
  title: string;
  dataType: 'Numeric' | 'JSON' | 'Text';
  readonly?: boolean;
}>

// 获取组件函数列表(用于编辑器显示可调用方法)
static getFuncList(compConfig: Record<string, any>): Array<{
  title: string;
  name: string;
  args: Array<{
    name: string;
    title: string;
    dataType: 'Numeric' | 'JSON' | 'Text';
  }>;
}>

// 获取组件事件列表(用于编辑器显示可监听事件)
static getEventList(): Array<{
  name: string;
  title: string;
  data: string;
}>
方法说明:
getVariableList: 告诉编辑器组件有哪些变量可以在页面中引用getFuncList: 告诉编辑器组件有哪些方法可以在页面中调用getEventList: 告诉编辑器组件会触发哪些事件供页面监听
测试
使新元素生效
- 清理缓存:删除应用目录中的
dist目录 - 重启服务:重启桌面端
- 触发打包:访问应用页面,系统自动重新打包
在标准页面中测试
进入JitAi可视化开发工具,创建一个标准页面,在页面中添加刚刚创建的计数器组件。
当切换到代码模式下会看到页面的scheme.json文件中自动生成了如下配置:
{
    "layout": [
        {
            "i": "CounterType2",
            "x": 0,
            "y": 0,
            "w": 48,
            "h": 30
        }
    ],
    "componentList": [
        {
            "fullName": "components.CounterType",
            "type": "components.CounterType",
            "name": "CounterType2",
            "title": "计数器组件2",
            "config": {
                "requireElements": []
            },
            "showTitle": true,
            "eventList": [
                {
                    "name": "valueChange",
                    "title": "值变化",
                    "data": "eventData"
                }
            ],
            "functionList": [
                {
                    "title": "获取值",
                    "name": "getValue",
                    "args": []
                }
            ],
            "variableList": [
                {
                    "name": "value",
                    "title": "当前值",
                    "dataType": "Numeric"
                }
            ]
        }
    ],
    "autoIncrementId": 3,
    "variableList": [],
    "functionList": [],
    "matchUarParamsVariableNameList": []
}
基础功能验证:
- 在页面中查看计数器组件是否正常显示
- 点击加号按钮,验证数值是否增加
- 点击减号按钮,验证数值是否减少
- 检查组件标题是否正确显示
可以尝试修改scheme.json文件中的配置项目(例如name,title,showTitle等),然后切换到可视化模式下,看看计数器组件会发生什么变化?
总结
新增前端组件Type元素的核心步骤:
- 创建目录结构:
components/YourType/+ 必需文件 - 配置e.json:
type: "components.Meta" - 实现组件类:继承
BaseComponent+ 三个静态方法 - 创建渲染组件:React组件接收
compIns参数 - 正确导出:
ComponentCls和Render
关键要点:
- 导出名称
ComponentCls/Render不能改 - 必须实现
getVariableList/getFuncList/getEventList
进阶思考
手动在页面scheme.json中修改配置项虽然可行,但却不够直观易用,业务专家们在可视化搭建时并不方便。
怎样像官方组件一样,在可视化界面中配置计数器组件的参数呢?
请参考 开发前端组件元素的可视化编辑器。