开发前端组件元素的可视化编辑器
当我们完成了新增前端组件后,组件虽然可以在页面中使用,但配置参数需要手动修改scheme.json文件,这对不擅长编码的业务专家来说并不友好。
本文将介绍如何为计数器组件开发可视化配置编辑器,实现在JitAi开发工具中像官方组件一样的图形化配置体验。
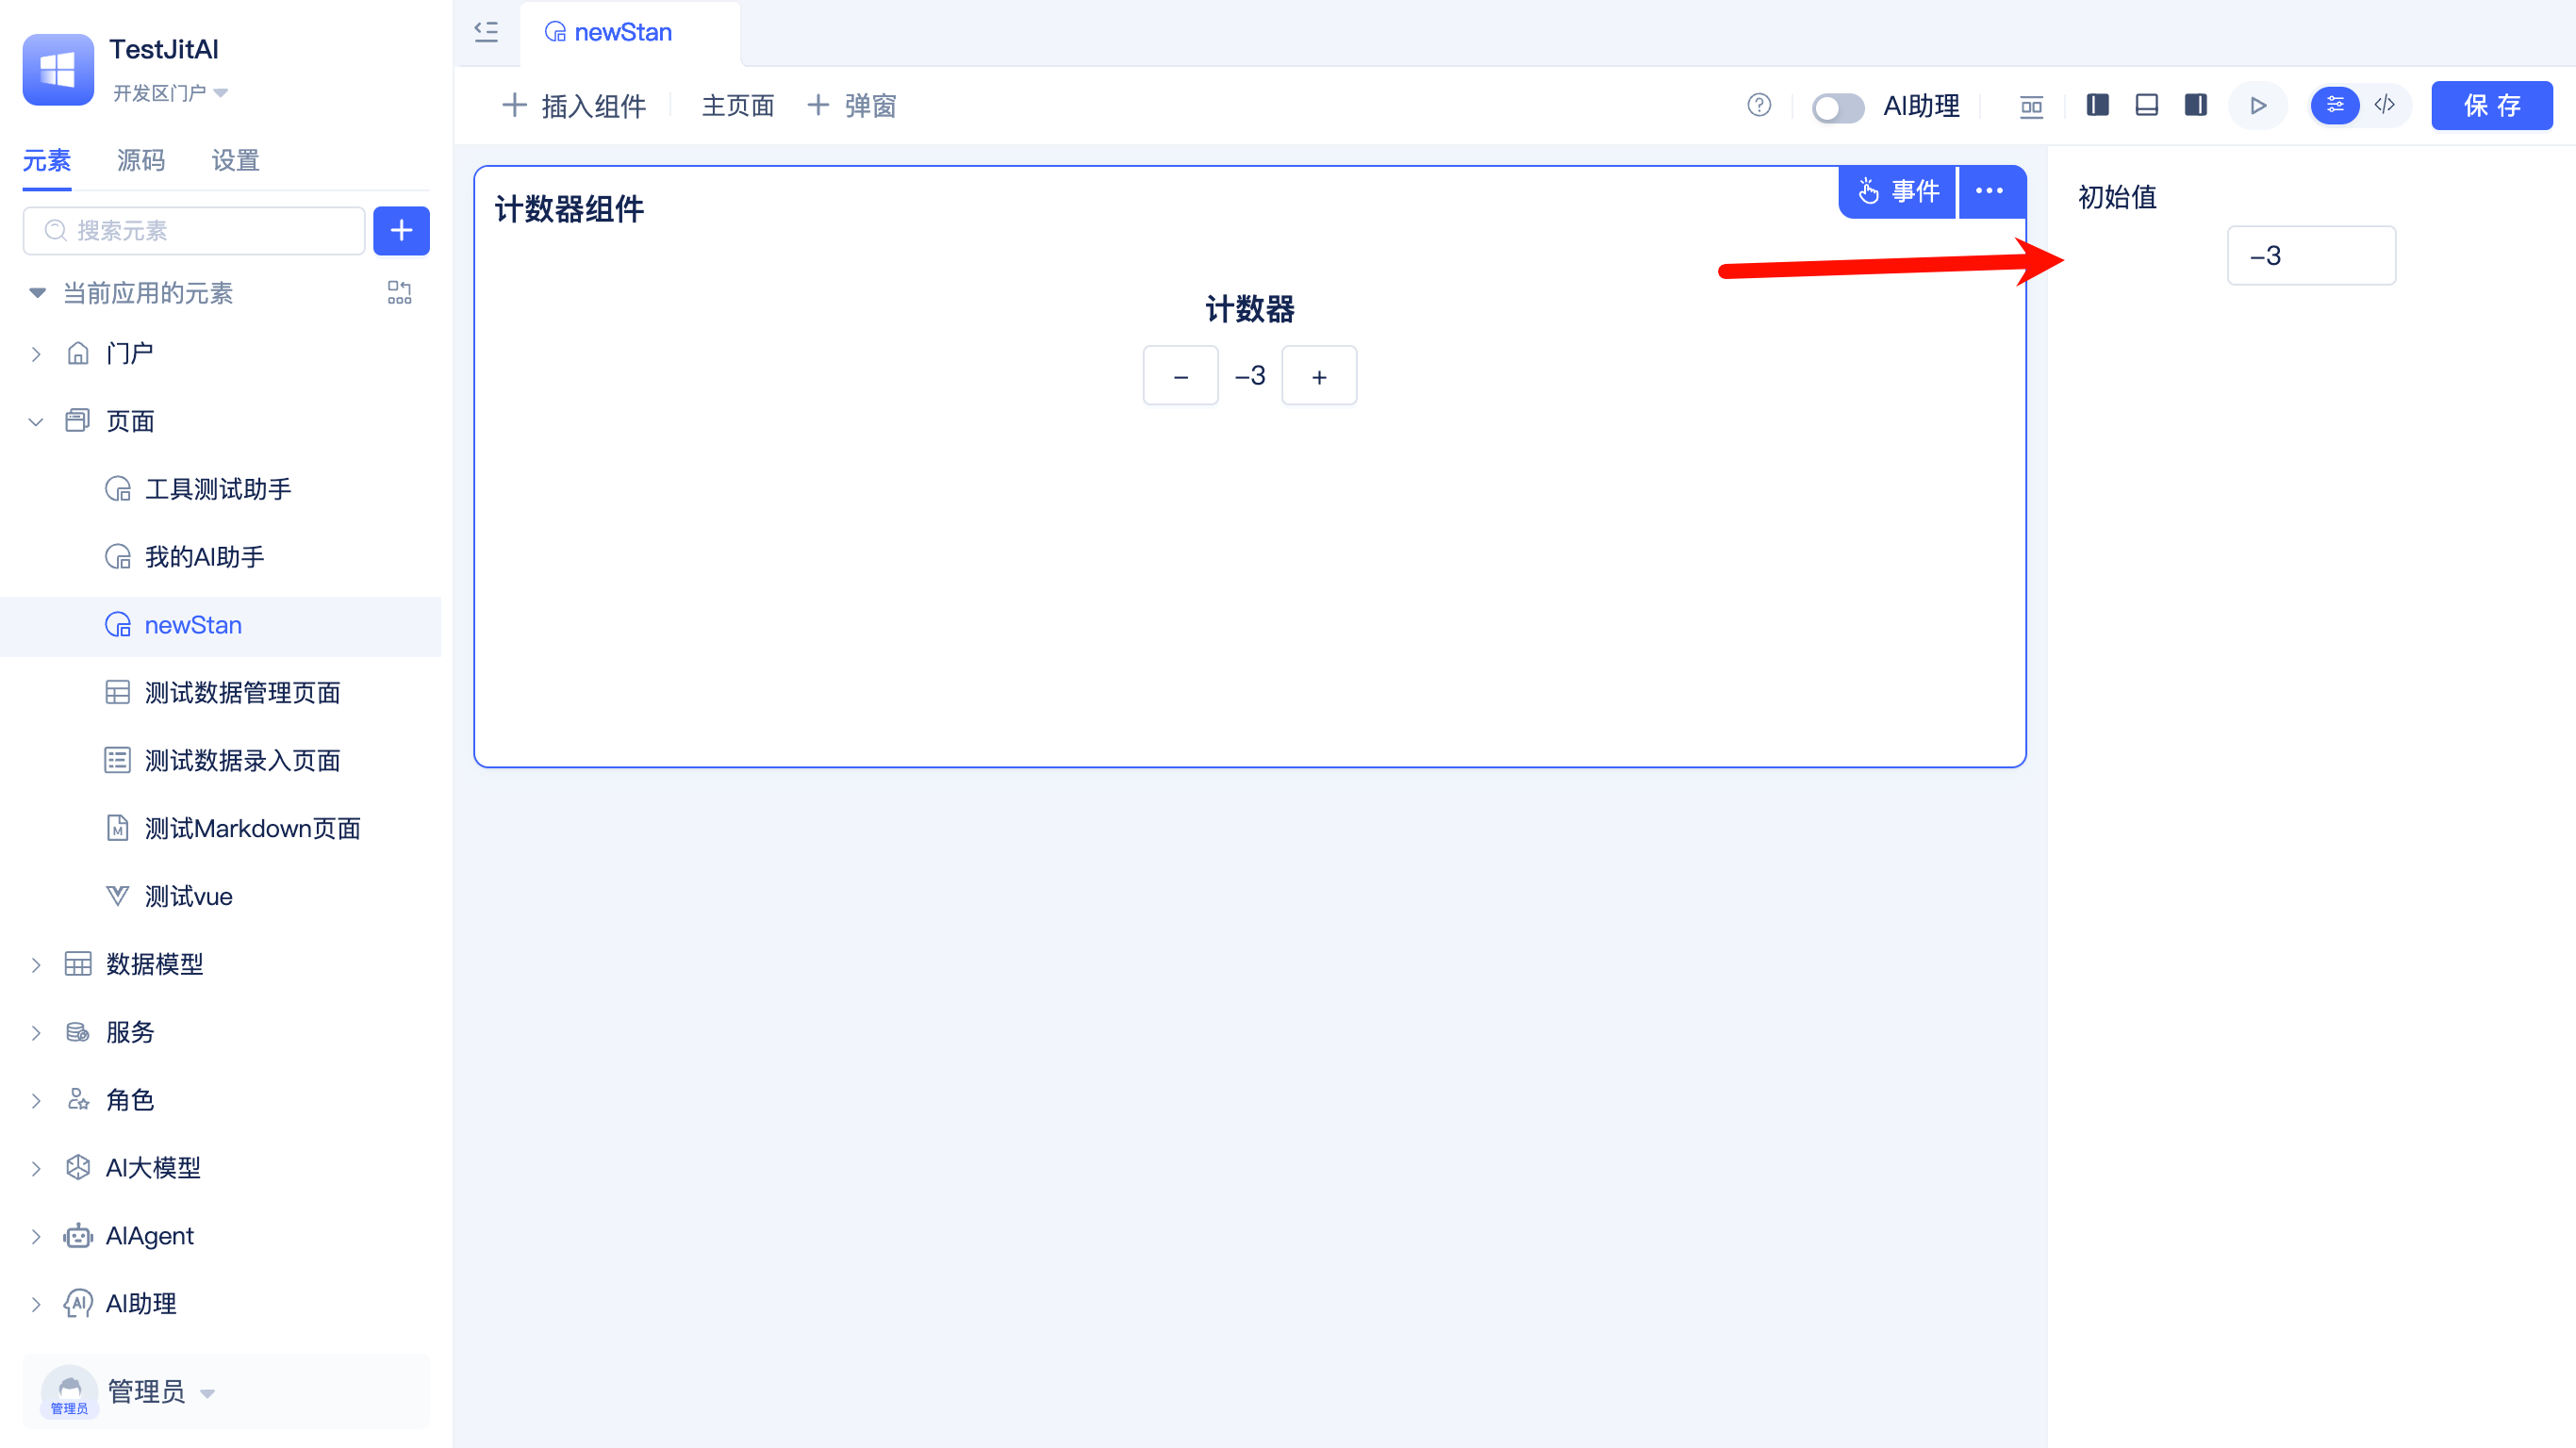
效果预览
开发完成后,在可视化开发工具中选中计数器组件时,右侧属性面板将显示友好的配置界面:
编辑器架构
| 元素层次 | fullName | 主要职责 |
|---|---|---|
| 编辑器元素 | components.CounterType.Editor | type指向editors.React,为CounterType提供可视化配置界面 |
| 目标组件 | components.CounterType | 被编辑的目标组件,已在前面章节完成 |
编辑器目录结构
在CounterType下新增Editor子目录
components/
└── CounterType/
    ├── e.json                          # 组件声明文件
    ├── index.ts                        # 组件PC端入口
    ├── index.mobile.ts                 # 组件移动端入口
    ├── CounterComponent.ts             # 组件业务逻辑
    ├── render/                         # 组件渲染层
    │   ├── pc/
    │   └── mobile/
    └── Editor/                         # 编辑器目录(新增)
        ├── e.json                      # 编辑器元素定义文件
        ├── index.ts                    # 编辑器入口文件
        └── Editor.tsx                  # 编辑器实现文件
操作指南
创建编辑器目录
在CounterType目录下创建Editor子目录:
# 在CounterType目录下执行
mkdir -p Editor
实现编辑器文件
- 元素定义文件
- 入口文件
- 编辑器实现
创建编辑器元素定义文件 components/CounterType/Editor/e.json:
编辑器也是元素
在JitAi中,编辑器本身也是一个元素,拥有自己的e.json定义文件。
components/CounterType/Editor/e.json
{
    "title": "计数器组件编辑器",
    "type":"editors.React",
    "tag": "config",
    "targetType": "components.CounterType",
    "frontBundleEntry": "index.ts"
}
编辑器元素配置说明:
title: 编辑器元素显示名称type: 固定为editors.React,表示React编辑器元素tag: 固定为config,表示配置编辑器targetType: 目标组件的fullNamefrontBundleEntry: 编辑器入口文件
创建编辑器入口文件 components/CounterType/Editor/index.ts:
components/CounterType/Editor/index.ts
import CounterEditor from "./Editor";
export const Editor = CounterEditor;
编辑器导出规范
编辑器必须导出名为Editor的组件,这是JitAi工具识别编辑器的固定约定。
创建编辑器主体文件 components/CounterType/Editor/Editor.tsx:
components/CounterType/Editor/Editor.tsx
import type { FC } from 'react';
import type { CompEditorProps } from 'components/common/types';
import { useState, useEffect, useRef } from 'react';
import { Form, InputNumber } from 'antd';

const CounterEditor: FC<CompEditorProps> = (props) => {
  const { onChangeCompConfig } = props;
  const didMountRef = useRef(false); // 防止初始化时触发回调

  // 1. 管理组件配置状态
  const [compConfig, setCompConfig] = useState(props.compConfig);

  // 2. 配置更新函数
  const updateConfig = (updates: Record<string, any>) => {
    const newConfig = {
      ...compConfig,
      config: {
        ...compConfig.config,
        ...updates,
      },
    };
    setCompConfig(newConfig);
  };

  // 3. 配置变化时通知父组件(跳过初始化)
  useEffect(() => {
    if (!didMountRef.current) {
      didMountRef.current = true;
      return; // 跳过组件初始化时的回调
    }
    onChangeCompConfig?.(compConfig);
  }, [compConfig, onChangeCompConfig]);

  // 4. 渲染配置界面
  return (
    <div style={{ padding: '16px' }}>
      <Form layout="vertical">
        <Form.Item label="初始值">
          <InputNumber
            value={compConfig.config?.initialValue || 0}
            onChange={(value) => updateConfig({ initialValue: value || 0 })}
            placeholder="请输入计数器初始值"
          />
        </Form.Item>
      </Form>
    </div>
  );
};

export default CounterEditor;
编辑器工作原理
数据流转机制
- 配置接收: Editor组件通过
props.compConfig接收当前组件配置 - 状态管理: 使用
useState在编辑器内部管理配置状态 - 配置更新:
updateConfig函数合并更新配置对象 - 变化监听:
useEffect监听配置变化 - 回调通知: 通过
onChangeCompConfig回调通知工具配置已更改
核心接口规范
CompEditorProps接口
JitAi提供的接口
CompEditorProps是由JitAi IDEApp提供的标准接口,开发者可直接从components/common/types导入使用,无需自己定义。
// 从JitAi导入,无需自己定义
import type { CompEditorProps } from 'components/common/types';

interface CompEditorProps {
  compConfig: {
    name: string;           // 组件实例名称
    title: string;          // 组件显示标题
    showTitle: boolean;     // 是否显示标题
    config: {               // 组件自定义配置
      initialValue?: number;
      // 其他配置项...
    };
    // 其他系统配置...
  };
  onChangeCompConfig?: (newConfig: any) => void;  // 配置变化回调
}
配置更新最佳实践
// ✅ 正确的配置更新方式
const updateConfig = (updates: Record<string, any>) => {
  const newConfig = {
    ...compConfig,                    // 保留原有配置
    config: {
      ...compConfig.config,           // 保留原有config
      ...updates,                     // 合并新的配置
    },
  };
  setCompConfig(newConfig);
};

// ❌ 错误的配置更新方式
const updateConfig = (updates: Record<string, any>) => {
  setCompConfig({ config: updates }); // 这会丢失其他配置
};
测试
使编辑器生效
- 清理缓存:删除应用目录中的
dist目录 - 重启服务:重启桌面端
- 触发打包:访问应用页面,系统自动重新打包
验证编辑器功能
- 打开页面编辑器:在JitAi开发工具中打开包含计数器组件的页面
- 选中组件:点击页面中的计数器组件
- 查看属性面板:右侧属性面板应显示"初始值"配置项
- 修改配置:尝试修改初始值,观察组件是否实时更新
- 保存验证:保存页面后重新打开,确认配置已持久化
常见问题排查
- 编辑器不显示:检查
e.json中targetType是否正确指向组件 - 配置无法保存:确认
onChangeCompConfig回调是否正确调用 - 初始化出错:检查
didMountRef是否正确避免初始回调
进阶扩展
如需为计数器组件添加更多配置选项,只需在编辑器中增加对应的表单控件:
<Form layout="vertical">
  <Form.Item label="初始值">
    <InputNumber
      value={compConfig.config?.initialValue || 0}
      onChange={(value) => updateConfig({ initialValue: value || 0 })}
    />
  </Form.Item>

  <Form.Item label="步长">
    <InputNumber
      value={compConfig.config?.step || 1}
      min={1}
      onChange={(value) => updateConfig({ step: value || 1 })}
    />
  </Form.Item>

  <Form.Item label="最大值">
    <InputNumber
      value={compConfig.config?.max}
      onChange={(value) => updateConfig({ max: value })}
    />
  </Form.Item>
</Form>
支持的Antd组件:InputNumber、Input、Switch、Select、DatePicker等。
总结
为前端组件开发可视化编辑器的核心步骤:
- 创建Editor目录 + 配置编辑器元素定义文件
e.json(type: "editors.React") - 实现Editor组件:接收
CompEditorProps+ 渲染配置表单 - 正确导出:导出名为
Editor的组件 - 配置同步:通过
onChangeCompConfig回调更新配置
关键要点:
- 导出名
Editor不可更改 CompEditorProps由JitAi提供,直接导入使用- 必须正确合并更新配置对象
- 使用
didMountRef避免初始化时的无效回调